Cake pops are yummy and fairly easily eaten while standing
up. For these reasons I really like them for a party or stand up function,
especially with kids.
I will be fair in telling you that, while they are not
difficult to make, they require several steps and are a bit time consuming. If
you need quick and easy, you may want to stick with cookies or brownies. If you
have a little extra time though, these are a fun alternative and do not require
a crazy amount of skill.
Let me also, tell you that this is NOT the only way to make
cake pops. In fact there are probably at least 10 other ways and an additional
100 little tips that different people use.
This is simply, my way. This is the way that I find works the best and
tastes yummy.
So here goes…
Start by making your favorite
cake recipe. You can use a box or homemade. It can be light or dense because
it will get a binding in the next step. Just remember that the texture will get
a bit masked, so it may not be worth perfection in that aspect. Just make
something that will taste good. In fact, in the below recipe, I was in such a
rush that I used bought pound cake. It worked fine, especially for a baseball
team of 8-year-olds!
When it is done
baking, let it cool and crumble it up in a bowl. Now you see why I told you
it just needs to taste good. Next, add your favorite icing and mix together. Again, due to my limited time, I used bought frosting, but you could make your own. Start by adding two heaping tablespoons and go from there. I find that I usually use a third to a half of a small container. You want to add enough that you can bind the cake and form balls, but not so much that it is too heavy or wet. The balls will get to hard to dip.
Now you are ready to
form the balls. I find the easiest way is to use your hands. Just like when
I make meatballs, I can’t find a better way that make them nice and round. Oh,
and at the advice of my son, “Wash your hands first, no one wants to eat your germs.” Funny that he says that considering how often
I have to remind him to use soap. Boys!
Once they are formed, put them on a plate that they won’t stick to and chill them for a few minutes in the fridge. They should be ready in about 15-30 minutes. They do not need to be cold, but they need to set so that they will dip easily. I find glass works, but you could use parchment paper. Make sure they do not touch. If you are going to leave them for a while, put them in a container with a lid so that they do not dry out. Sometimes I make these first few step and finish the next day.
This next step is one of the most easily left out but one of the most IMPORTANT.
Melt a small amount of dipping chocolate. You can use chips or the discs. You are not dipping the pops yet, so you do not need a huge amount.
Here is the important part…
Dip your pop sticks into the chocolate and then dip them into the cake balls. This will secure the stick. If you do not do this, the cake may fall off when you start to dip it.
Dip your pop sticks into the chocolate and then dip them into the cake balls. This will secure the stick. If you do not do this, the cake may fall off when you start to dip it.
Again,
stick them back in the fridge to set. I dip ½ of them at a time so that
one group can set while I work on the others.
Now you are
ready to melt your chocolate for dipping.
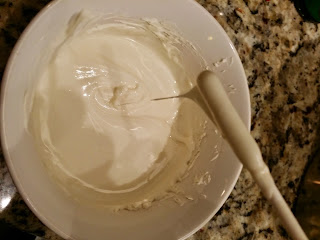
You want to get your chocolate smooth. It should not be too runny but
not too thick. If it is a little thick, I add a little bit of oil. Maybe ½ to a
full capfull depending on how much chocolate. When you pull up on the chocolate, it should
easily run off your stick, but not like water.
Now you can
dip your pops. I did not use a deep enough bowl, so I had to help get
the chocolate around the pops. Also, I let my son help, so they were not
smooth, but that’s ok. It was for his birthday and he wanted to help.
Again, I put them back
in the fridge to set before decorating.
If you want them to sit upright to display, I find the easiest
way is to use the green floral foam blocks. You can cover them with tissue
paper or whatever works for your display and they can be used more than once.
I had this great idea to create a baseball field, but again,
my son wanted to help and I love that he wanted to be part of it. We kept
it a bit simple and he loved them.
Enjoy!


No comments:
Post a Comment